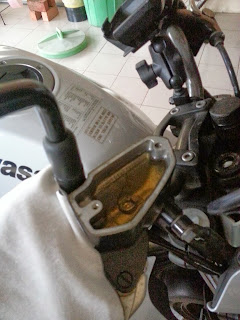
Changing your motorcycle brake fluid sometimes can be a pain in the ass for some people but with proper tools, it is very easy to be completed. The method I am going to show apply to non ABS and ABS model with ABS model consume slightly more brake fluid because of the system volume.
Many may just ask, why should I change my brake fluid, well, many times brake fluid maintenance can be the most easily ignore maintenance task for many riders. Brake fluid have to pick up the heat transfer from the brake calipers and eventually it will deteriorate just like any other engine oil or lubricant. Make no mistake, brake fluid is not a kind of 'oil' even it does hold the oil composition in it, it is more like a chemical which is blend to provide force while withstand the heat at a degree. Remember to use the recommended brake fluid grade from your manufacturer else you just gonna burn money on the brake system again. There are DOT 3, 4, 5 and 5.1 brake fluid available, using a DOT 3 on a DOT 5 system will just result in blowing out your brake fluid. The higher the number means the higher the wet(with moisture absorbed into the fluid) and dry(0% water content which is impossible to obtain under normal operating condition) boiling point it can withstand. As a result, check before apply always the important thing before you start.
Below is the method i use to 'reverse' replace the brake fluid from the reservoir, machine used is Kawasaki ER6n
Tools you needed
b)A tube (match the syringe end)
c)Brake fluid
d)Spanner which match the bleeder nut
Steps
1)Remove your master pump reservoir cap.
2)Plug in the tube to the caliper bleeder valve and loosen it with your spanner.
3)Started to 'suck' it out from the reservoir through the bleeder valve. Remember to stop once you reach the level which touches the hole of the master pump(to prevent sucking in air).
4)Tighten the bleeder nut and started to suck the remaining old brake fluid from the reservoir with cloth or paper, clean it.
5)Top it up with new brake fluid and loosen back the bleeder valve, suck the new brake fluid to flush the system as step 3. Top it up again and normally you will just take 1-2 cycle to flush the system.
6)When finish, tighten the bleeder nut and top up the reservoir according to manufacturer recommendation (remember not to fill it too high up as the diaphragm will not have enough air to create enough pressure on the reservoir), move to the next caliper or proceed to step 7.
7)Before installing back the reservoir cover, remember to pump your reservoir several times to make sure no air is trap inside the brake line. Install the reservoir cover.
Enjoy your fresh Lemon Tea, do not dispose brake fluid irresponsibly to the environment, it is highly corrosive!!!


No comments:
Post a Comment